
Learning how to build a boat console is a fantastic way to add a personal touch to your boat.
It might seem daunting at first, but with resources like MyBoatPlans, the task can become much more straightforward.
With over 518 step-by-step plans to create a custom boat, you can use professional advice to save you frustration.
There are plenty of essential tips and tricks to take into consideration when you start building. In this guide, we’ll help you to get started with building your very own boat console.
Step 1: Drawing the Plans
First, you’ll want to start drawing the plans on paper, so you have a visual representation of what you need.
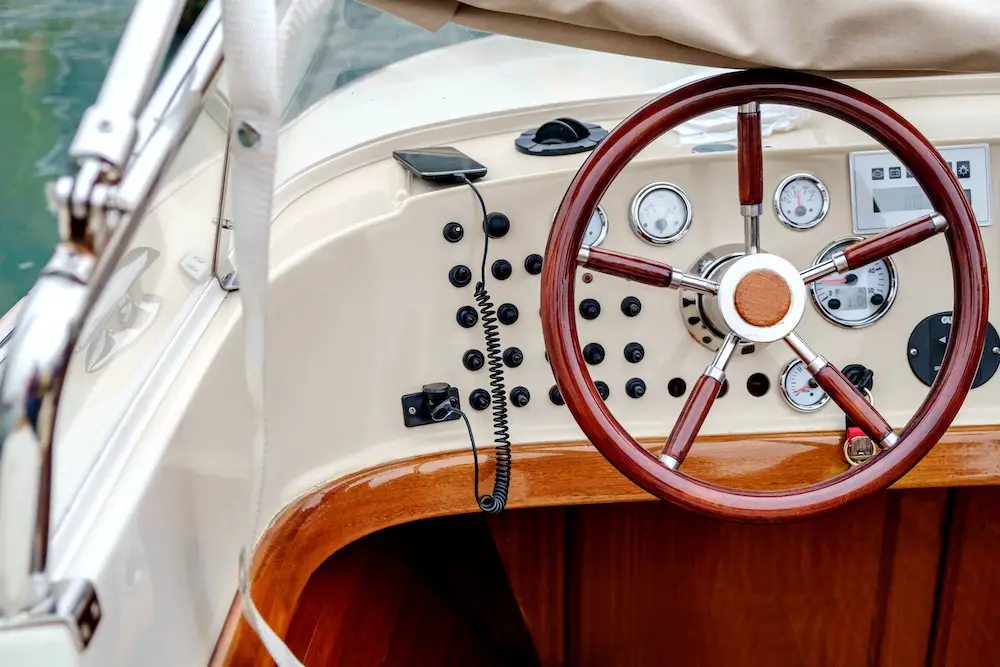
Make sure you have your gauges marked as well as the precise measurements for your boat.
During this step, you’ll also need to consider how the console will be used.
One crucial question to ask is, will you be sitting or standing while you drive? If sitting, your console will be substantially shorter than if you’re standing.
Alternatively, you can find a median height that makes your gauges easy to see from any position.
You’ll also want to think about if you’ll need any storage, side-mounted controls, drink holders, grab rails, and more.
An excellent recommendation is to find a manufactured console that has everything you need and use the design as inspiration.
By doing this, you can make sure you have everything that you need to draw onto your plan.
Step 2: Building a Mockup
The next step is to make sure you can build a mockup to test before investing in the real deal. This part is exciting, as you can finally start to see your plans come to life.
Using cardboard, you can quickly put together a basic design of what you want to have installed.
This will allow you to determine if the sizing is accurate and comfortable for your boat.
In doing this, you can also get an idea of whether your gauges are comfortably accessible and easy to see.
Boaters might even find that there are extra things they have space for, such as additional cup holders.
On the other hand, having a mockup can also tell you if you need to scale back on your design. You might even find that the design won’t work, and you’ll need to start from scratch.
Regardless, building a mockup is slightly more time consuming but makes sure you don’t waste materials.
Step 3: Gathering Materials and Tools
When you’ve decided on a mockup that works well, it’s time to gather the materials and tools.
Fortunately, building the frame for a console is much like building a box, so it isn’t too tricky.
The most complicated part of the process will be installing the electronics and the aesthetic finishes.
For the job, we recommend having the following at your disposal:
Tools
- Circular saw
- Measuring tape
- Right-angle braces
- Drill
- 5/8-inch tapered drill bit
- 1.25-inch, no. 5 wood screws
- Putty knife
- Gloves
- Safety glasses
Materials
- 3/4-inch marine plywood
- Fiberglass mat
- Marine epoxy
- 320-grit sandpaper
Step 4: Preparing Your Wood
1. Measuring and Marking
Before you start assembling the console, you’ll have to cut all of your wood pieces to fit together easily.
Using your marine plywood, you’ll want to measure and mark the front panel of your console as well as the rear panel.
Ensure the front panel matches the back panel’s width, but the rear panel should be three inches shorter than the front.
At this time, you will also need to measure and mark the top of the console. The width of the top should be equal to the width of the entire console.
The top’s front and rear edges should be in line with the front and back panels. You’ll also want to take this time to measure the side panels, as well.
The width of both side panels should be of equal depth, and the front edge will need to be similar to the height of the front panel.
Similarly, the back edge of the side panel should equal the height of the rear panel.
2. Cutting the Wood
With your measurements marked on your wood, it’s now time to do the cutting.
Take the time to make sure the edges are exact, as it will help you save time when finishing. It’s also recommended you try to fit the pieces together to ensure they are accurately cut.
Step 5: Assembling the Console
Using your right-angle brackets, you’ll want to begin by attaching the front panel first. Make sure you place the brackets ¾ inches away from the edges on the front panel.
You can then attach the side panels, making sure the top edges are even.
Follow with the rear panel, ensuring those top edges are in line with the top edges of the side and front panel.
Once this process is complete, the frame for your console should feel sturdily assembled. For extra support, you’ll want to use your ⅝-inch tapered drill bit and your drill.
Make four holes on both sides of the rear panel to go through each of the side panels.
Each hole should be 1.25 inches in-depth to secure the rear panel to the side panels with your no.5 wood screws.
For the final step of assembly, you’ll need to install the top panel, which will become your dashboard.
You can hold the dashboard in place with duct tape, allowing you to drill the necessary holes.
Using your drill again, you’ll want to make four 1.25-inch deep holes on either side. Take your wood screws and affix the top of the console to the side panels.
Step 6: Preparing for Instruments
You should have an entirely constructed console where you can begin to plan where you want your instruments.
If you haven’t already marked where you want your gauges to be placed, do so now.
After this is finished, you can use your drill to cut all of the required openings for your controls.
Depending on the size of your gauges and instruments, you will likely need drill bits of various sizes.
Make sure you do a test fit of all of your controls to make sure they will be able to fit accordingly.
It could be better to size the holes equal to the size of your instruments, as you can fill any gaps with caulk.
Step 7: Finishing Touches
1. Caulking
The last thing you’ll have to do for this project is to add your finishing touches, as they are the most important.
You’ll want to use caulk to ensure all of the seams along your console have been filled.
It’s highly recommended you consider using marine silicone caulk, as it will have the highest level of water resistance.
As you fit your instruments into their allocated spots, ensure you caulk around them and create a water-tight seal.
There’s no such thing as too much caulk, so ensure you are correctly insulating everything.
2. Applying Epoxy and Fiberglass Mats
For this step, you will be applying marine epoxy across the entire surface of your console.
Once the resin has been applied, add your fiberglass mats on top, taking your putty knife to add pressure.
Make sure you work out any bubbles and that the fiberglass mat is lying flat and is gripped by the epoxy.
Allow your first layer of fiberglass to cure for an hour and then apply a second and third layer following the same steps.
Once finished, you can use sandpaper to soften the edges and surface of your fiberglass. Ensure you cover every inch, as you’ll need a smoothly finished surface if you decide to add paint.
MyBoatPlans: A DIY Console-Building Guide
MyBoatPlans is much more than a collection of tutorials; it’s a diverse guide for building a boat.
Designed by a master boat builder and educator, this comprehensive guide can help you to build the perfect console.
Whether you want to follow an existing plan or design your console using CAD software, this program is precisely what you need.

Boaters will have access to a variety of high-quality photos of finished products for inspiration and over 40 easy-to-follow tutorials.
We recommend looking at the 518+ step-by-step plans to guide you through the process of building a boat from scratch.
Even if you have zero boat building experience, you’ll create your dream boat with ease using MyBoatPlans.
How to Build a Boat Console: Final Thoughts
The most important part of your project is to begin preparing for the job.
Not only will you want to make sure you have all of the necessary tools, but that you also have a working plan in mind.
Every boat is different. As such, there isn’t one all-encompassing building plan that is guaranteed to work.
You’ll likely have to make a couple of adjustments to find the perfect size. Different types of consoles might work better for you, too, such as a side console versus a center model.
MyBoatPlans is a phenomenal resource to help you learn how to build a boat console.
With unique tips and tricks, as well as great ways to create a custom console, it’s an invaluable resource.
Instead of buying a store-bought product, you can add a personal touch explicitly designed for you.

whoah this blog is magnificent i love reading your posts.
Stay up the good work! You recognize, a lot of individuals are searching round for
this information, you can aid them greatly.
Thank you for your kind words! We’ll make sure to give you more high quality content in the future 🙂
Greetings! Very useful advice in this particular post!
It’s the little changes which will make the greatest changes.
Many thanks for sharing!
And thank YOU for taking the time to read our post. We hope that you’ll come back for our future posts as well 🙂
Hiya! I know this is kinda off topic however , I’d figured I’d ask.
Would you be interested in exchanging links
or maybe guest authoring a blog article or vice-versa?
My website covers a lot of the same topics as
yours and I feel we could greatly benefit from each other.
If you are interested feel free to shoot me an e-mail.
I look forward to hearing from you! Great blog
by the way!
Hello and welcome! Thank you for reaching out to us. Kindly provide the link of your website and other details that we need to know. Just send those to patriciagracebarre@gmail.com 🙂
Hi there would you mind letting me know which hosting company you’re
utilizing? I’ve loaded your blog in 3 completely different web browsers
and I must say this blog loads a lot quicker then most.
Can you recommend a good web hosting provider at
a honest price? Many thanks, I appreciate it!
Hello and welcome :). We are using wordpress for Boat Diaries.
I’m not sure exactly why but this blog is loading incredibly
slow for me. Is anyone else having this issue or is
it a problem on my end? I’ll check back later and see if the problem still exists.
So sorry to hear that. Upon checking, the blog section is loading just fine. But we’ll look more into it 🙂
I love reading through an article that can make people think.
Also, many thanks for permitting me to comment!
Thank you so much for saying that. We truly appreciate it 🙂
Can you tell us more about this? I’d love to find out more details.
Hello :). What more would you like to know?
I read this piece of writing fully about the difference of most recent and previous technologies,
it’s amazing article.
That is a good tip particularly to those new to the blogosphere.
Brief but very precise info… Appreciate your sharing this
one. A must read article!
Thank you for your kind words! Come back again soon for more high quality content 🙂