
Have you ever dreamt of building a boat and then getting away from it all? It may not be as hard as you imagine. There is a lot of great information out there. And if you are looking for a great resource that we highly recommend checking out the My Boat Plans website. You won’t have to look elsewhere to find questions on how to build a boat.
With a little hard work and some patience, even the most untrained individual can find themselves floating across the water on a peaceful night in no time. If that sounds good to you, then keep reading, because we are going to break down the basics of why and how to build a boat from scratch.
Why Build a Boat?
There will never be a better time to discover the joys of building your own boat. That is because a tide of experts and maritime draftsmen have inundated the online world with lots of modern designs for novices to use. Current materials, such as compressed wood, fiberglass, and epoxy, make it conceivable to fabricate lightweight, corrosion-proof, and solid composite structures.
In recent years, numerous boat building enthusiasts have likewise begun designing and selling kits with the blueprints of any number of boats. They have also included all the frame lumber and bulkheads. This is all made easier and more cost-effective by the use of new technology like CNC tools and routers.

Exact measurements are ensured by the use of these tools, and the lumber is already cut to the specific design. This could be a way to cut down on the actual time it takes to craft your vessel. Even if you don’t go with a kit, the plans are still available. By using the plans, you can craft your boat with whatever material you want.All those logical and down to earth reasons in your mind against building your very own boat are pretty much null and void.
However, we know that it is hard to keep them from popping into your head every now and then, so let’s talk about a few that may be bothering you. Not every person who starts will have the patience and determination to finish the process. Novices will likely end up with a vessel that doesn’t quite look as refined as a more experienced craftsman does. Naturally, this can be a bit discouraging, especially if you are a perfectionist.
Another reason that many people push this dream aside is that they feel they can not save enough to be able to get all the materials needed. Though this can be frustrating, there are many ways to combat that if you really want to complete a project like building your own boat. Also, since it’s wood, it will mean a heavier maintenance schedule than just buying one of the fiberglass models.
Assembling your own boat permits personalization that would be unimaginable in a prefab model. Indeed, even crafting an unassuming day sailor will compel you to ride the ebb and flow of joy and frustration. In order to make this a fun and enriching experience, though, make sure to let go of the vision of perfection. The vision that you held when you originally spread out the plans may not come to fruition, and that is okay. Strangely, this will help make your experience more joyful, especially as you build a plan of attack to fix any unexpected issues.
How to Build a Boat
Okay, so building our own boat can be very fulfilling and could save you money in the long run. This is especially true when it comes to prefab models or even renting one when you need to get to your destination. Many of the boats plan that are available range in size, but one of the best ones to start with is a canoe.
Below, we are going to walk you through the steps you need to follow to build a high-quality canoe that will be useful for years to come. Get all your tools ready and get ready to build yourself a boat…
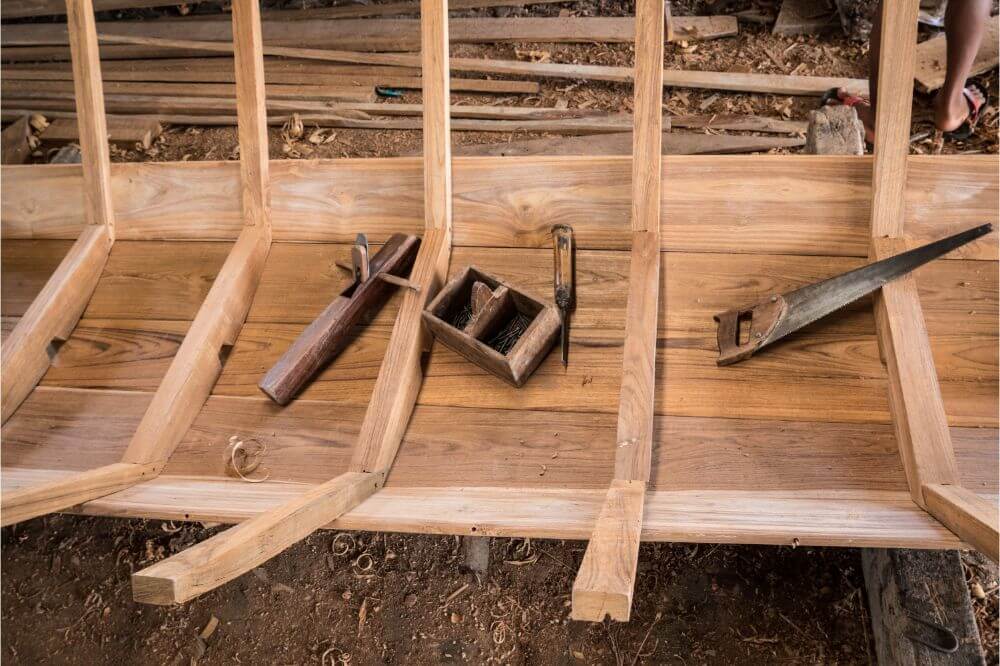
Tools Needed
Here are the tools and equipment items you will need to build your boat:
- Nails
- Ruler
- Saber saw
- Drill
- Baling wire
- Epoxy
- Foam paintbrush
- Wood flour
- Fiberglass tape
- Fine rasp
- 80 & 220 grit sandpaper
- Fiberglass cloth
- Razor knife
- Clear varnish/paint
The Frame
Take two sheets of plywood (4’ x 8’ x 1/8”) and rip them into 24” wide panels or 4 half sheet panels. Stack them on top of each other and connect them at the top and bottom with a few nails each. This canoe will take 3 panels per side.
It is now time to measure and mark the wood. You will want to start with a vertical line roughly every foot for the entirety of the 8’ plywood. Then, you will want to take a long stick and create a curved line, using these lines as guides. You should get a total of 12 panels from the four half sheets.
Now that you have the outline drawn and have made sure that the line is curved just right, you will take your saw and cut the wood. After you have the panels all cut, you should take a rasp and smooth down all the edges, staying as close to the line as possible.
With the panels completed, you will want to reach for your drill. It is time to drill some holes in the top and bottom. Lay the two matching panels together and then drill your holes about 3/8” from the top and bottom. These holes will be used in the next step, so make sure there are plenty of them.

Take your baling wire and cut the same amount of 3” pieces as you have drilled holes. Then, lay the two panels on top of each other if they aren’t already. Match up the holes. Then, run the wire through the holes, joining the two panels together. Leave the wires pretty loose so you can separate the panels, almost like a book.
Now, you have the bottom of the canoe ready. Next, you will move on to the top panels, making sure all the ends line up and then repeating the stitching process. You should now be able to see a true canoe-like shape.
Now that you have all the panels together, you will want to place a stick in the center of the top side to hold the frame in place while you complete your inspection and start on the next phase. You want to look and make sure everything lines up, and there are no twists. You will also want to make sure that the panels are all flush with each other so that you get smooth seams.
Now, it’s time to move onto permanently joining those panels…
The Panels
Start by mixing up some epoxy. You will want enough to cover all the panels’ joints. Take your foam brush and apply the mixed epoxy to those joints. You should aim for each joint to be covered by about an inch of this mixture. You also want to make sure that the epoxy soaks into the application area so that you get a good bonding.
Repeat this for every joint and, once the first coat has dried, add a second coat. The drying process should take about a day, so this portion of the build should take roughly two days.
Once the epoxy is dried, start cutting and removing the wire. Make sure to be careful, as the joints are still delicate. In the event that a joint does pop, put the wiring back in and re-epoxy it.
Now, you will mix epoxy with wood flour, otherwise known as very fine sawdust. This should be available at any boat building supplier. You want this mixture to be smooth and creamy. Next, apply this mixture to the joints. Try to make sure that you do not add too much epoxy, or the mixture will end up being weak.
The line of mixture that goes over the joints should be about 1 ½” -2” wide. Also, make sure to apply this mixture to the stem ends, as well. The amount on the stem end should be about ¾” thick, and it should be applied on the inside.
Now, you will want to take your fiberglass tape and apply it to the joints and stems on the inside of the boat. Then, you will want to add another layer of epoxy over this tape. Next, squeegee off the excess. Make sure to do this gently, as you don’t want to remove the filling you just placed in the joints. Once the epoxy has dried, you will want to apply another layer to make sure it is nice and sealed.
Now, you will turn the boat over and begin sanding the boat. Take a fine file and smooth the edges of the lower and bottom panels. Try not to be too rough, as you don’t want the wood to splinter. Then, take the 80 grit sandpaper to smooth the edges even more.
Next, use the 120 grit sandpaper to sand the outside of the boat. Clean up any stray drips of epoxy. When you are done, make sure to wipe off any excess sawdust from the sanding process.
It is now time to epoxy the outside of the boat. Use a thin coat applied by a foam brush and let it completely dry.
Once it is dry, you will want to sand it down with the 120 grit sandpaper once again. Then, you will apply the fiberglass cloth. Apply this the same way you applied the fiberglass on the interior of the boat. Once it is applied, it is safe to apply another layer of epoxy.
About two hours after applying the fiberglass, you will want to trim the fiberglass and epoxy. Do this before the epoxy hardens. Use your box knife to trim the gunnels edges, but do this carefully. The cloth is still damp and easy to move.
The last step with the panels will be to add another layer of epoxy. Then, you will want to sand the boat again. Once you have done this and wiped down any excess sawdust, your canoe is ready to paint.Now for the finishing touches on your amazing canoe…
Final Touches
- Turn the boat right-side-up and do so carefully. Make sure to have it in a nice cradle.
- Now, you will want to add the top rails of the canoe, otherwise known as the gunnels.
- This is the point where you decide if you want to varnish and leave the natural grain of the wood visible. If not, you can grab some paint and make yourself a stylish-looking boat.
- You will want to sand the inside of the boat and then add the varnish or paint.
- This is also the stage where you add seats. Do the same as with the rest and sand them down. Then, just wait for your boat to dry completely, and you will be set for outdoor adventure.
- This is a simple how-to on the construction of a canoe, but many of the basics boats will end up being just as easy.
Final Thoughts
If building your own boat was a dream of yours, you can check it off your list by following the guide we laid out above. There are a lot of reasons to do it yourself when it comes to your next boat. First, you can personalize it easier.
Then, there is the sense of accomplishment you will get when someone compliments your boat. You can say, “Thanks! I built it myself!”. All of this is why we hope that this guide has helped you find your confidence. We hope that you are headed out to the lumber yard right now!
Though it may take a bit of time, building your own boat isn’t as hard as you may think. Of course, it may be easier if you had a boat plan. If you want some great options, they are abundant on the web. As we said in the beginning, we can’t recommend the My Boat Plans website more highly.
And for more boat building tips, check our Boat Diaries’ blog section today!